~ John Irving
Summer is in full swing, and if your family is anything like mine, you have been soaking up as many hot and lazy days as you can before the cold weather returns. Right about now, your kids have been home from school for a month or more, have ridden their bikes, gone swimming, played in the sandbox, and done just about any other outdoor activity around. Now the words “Mom, I’m bored” have begun to escape their mouths. Well, while we can’t prevent them from uttering that lovely phrase, we have some activities that you might want to try!
Over the course of the next few weeks, we are going to be showcasing our Outdoor Art Summer series, which will be full of fun outdoor art projects and ideas that you can do with your kids. Hopefully some will be new to your family so you can all enjoy them! First up-pendulum painting!
The basic items include:
- Small binder clips
- Paper or plastic cups
- Scissors
- Hammer
- Philips head screwdriver or ice pick
- Cutting board or scrap of wood
- String or twine
- Paint
- Paper
Once you have gathered all of your supplies, the next task is to decide on how many colors you are would like to use. I opted for four colors: red, yellow, blue, and purple, but you can choose however many and whichever colors you would like.
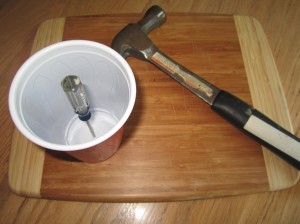
Gather up the corresponding number of plastic or paper cups, and punch a hole through the bottom with your screwdriver and hammer. *Make sure to do this on top of your wood cutting board or on a scrap piece of wood to protect your surface!
Notes:
- The larger the hole in your cup, the faster the paint will flow out. Keep this in mind when making your holes, and test with water in the cup to see how fast it will flow out. Remember that paint is thicker than water, and to help mine run out a little better, I mixed about one part water with one part paint.
- You can omit the paper cups, and reuse a plastic bottle with a spout or sports cap if you would like for this step too. I chose the plastic cup route because I wanted quick and easy clean-up!
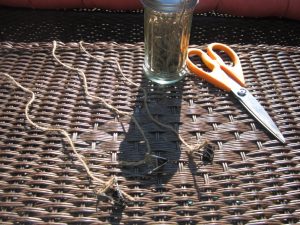
Now that your cups are ready to go, take some twine or string and tie it to the ends of your three binder clips. Leave about a foot of twine hanging from the clips for later.
The next step is to head out into your yard, and find a tree with a low hanging branch. Keep in mind when selecting your branch that paint is being used, and WILL extend beyond the limits of the paper you are using! Warning: Don’t put it next to your favorite set of garden furniture, or close to your child’s favorite toy.
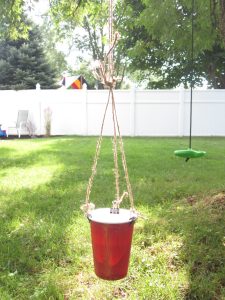
Take your twine, and throw it over the branch so that you now have two pieces making a “u” over the branch. Leave enough twine so that when your cup is attached it will be roughly 12” off of the ground. Make a knot in your twine. Then, take your three binder clips, attach them to the lip of one of your cups like shown above, and gather all three pieces of twine. Make a simple knot connecting the two sections.
Notes:
- As I stated above, the reason for the multiple cups is so that you have one cup per color. The reason for the binder clips is to hold the cups, and make it easy to quickly interchange one color cup for another.
- I also suggest having masking tape close by. Use it to cover the hole in the cup prior to filling it up with paint so that the extra paint doesn’t leak out everywhere.
- Does your yard lack a tree to hang your pendulum from? You could hang it from a swing set, or make a tripod using sticks or garden stakes and hang it from there!

Next, have all of your paints ready so that you don’t have to run back and forth from the house. I used 4 additional cups (without holes) to mix my paint and water. I mixed them with wooden skewers just because they were handy, but plastic spoons would work great too.
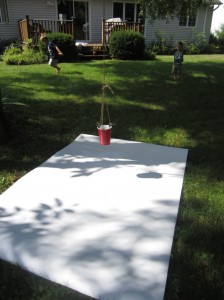
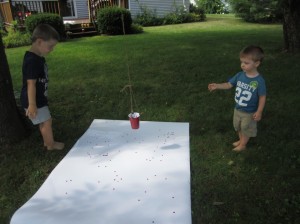
Once your pendulum is set up and you have gathered your supplies, place your paper underneath and you’re ready to go!
Our first color was a little thick, so it dotted the paper more than anything else, but the boys were mesmerized just the same!
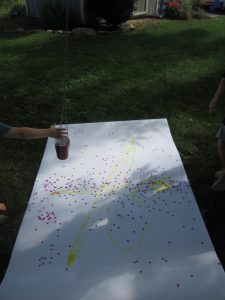
I thinned the yellow out with a little more water, and now the patterns started to take shape! We continued to change our paint cups and kept passing the cup back and forth over the paper until the boys thought it was “done”.

Finished Product!
We had a great time with this project. Although it might seem a bit complicated, it is actually very fast and easy to do. The overall preparation time was only about 10-15 minutes. The actual painting itself can take as long as you would like it to depending on how many colors you select, how much paint you use, and how many sheets of paper you decide to paint.
We have decided to hang our artwork in the playroom, but it would also make amazing wrapping paper! What would you use yours for? If you decide to try this project at home, we would love it if you could send us pictures of your finished artwork, or tips and tricks you discovered while trying it. Enjoy!


