Snowman in a Snow Globe Lesson Plan

What You’ll Need
- White paper provided by Original Works (or another high-quality, 70# 8 ½” x 11” art paper)
- Brown, orange, blue and black construction paper
- Washable white paint
- Small round sponges or sponge brushes, about 2 inches in diameter
- Glue
- Black markers
- Scissors
Project Prep
Before starting this project with your students, we recommend doing the project yourself. This way, you’ll have a sample project to show the students and you’ll understand any challenges they may have along the way!
For students on the younger end of the age range who are not skilled with scissors, we recommend cutting out all of the project components (the snow globes, the snow globe bases, the carrot noses, and the hats) before you get started. This way, you can hand out each component to the children as they work on the project.
For older, more capable kids, you can either prep the pieces ahead of time, or trace the components onto their respective construction papers and have the students cut along your lines with scissors to work on their scissor skills.
Either way, to begin the project, each student will need:
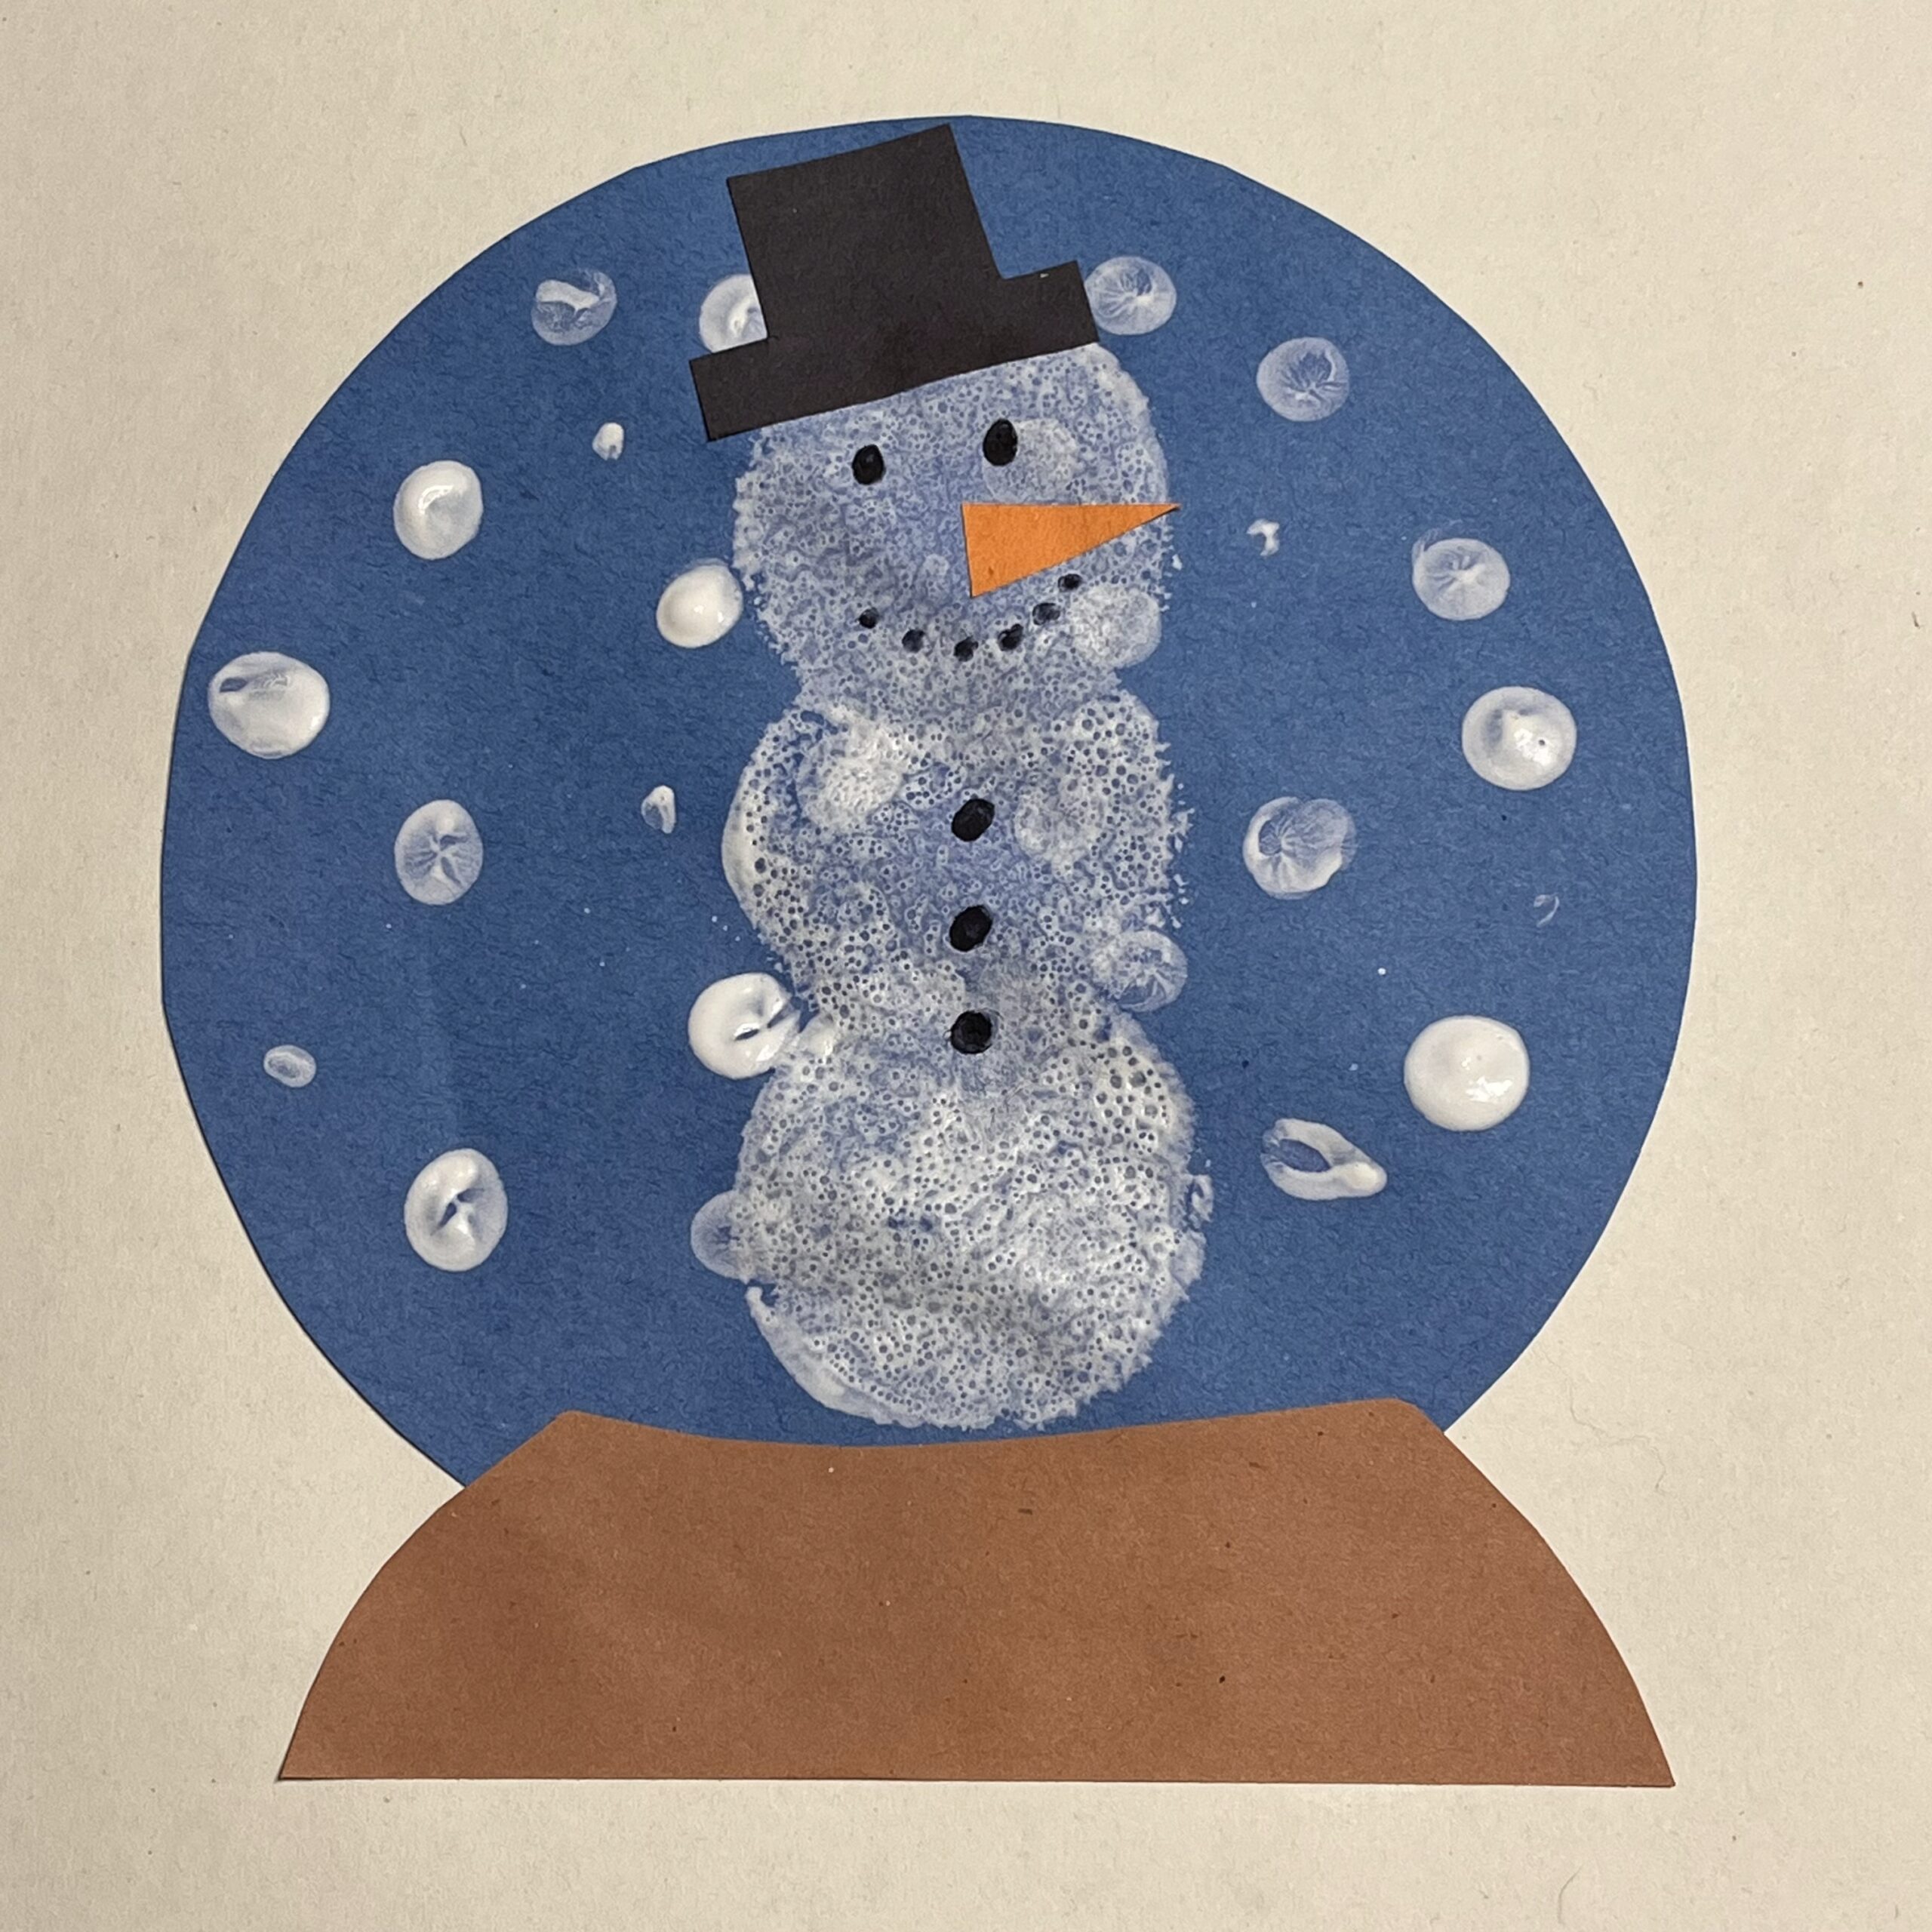
– One blue circle, about 6 inches in diameter
– One brown crescent shape for the snow globe base, about 5.5 inches long
– One carrot nose, about 1 inch long
– One top hat, about 1.5 inches wide at the brim, thinner in the middle
Snow Globe Project Instructions
This project will be completed in a few straightforward steps:
First:
- With white finger paint, have the students use their fingertips to paint dots all over the blue circle. These should look like snowflakes.
- Then, glue the base of the snow globe to the bottom of the blue circle now dotted with white.
Next:
- Cover the circular sponge or sponge brush in white paint and dot three circles, one on top of the other and slightly overlapping, starting the bottom circle where the snow globe base meets the snow globe. This should look like the body of a snowman.
Last:
- After the paint has dried, glue the snow globe to the white piece of paper.
- Note that younger children will likely need some one-on-one help with this step. Glue sticks are a good idea!
- Once the snow globe is secure, glue on the snowman’s hat and his carrot nose. Finally, draw on some eyes, a smile, and some buttons with a black marker. To finish the project, students should sign the front of their artwork at least 1” away from the edge of the paper.
This snowman project is easy and turns out great every time. It helps students develop dexterity and comprehension skills, while also enabling them to be creative. Keep this one in mind if you’re looking to do a holiday order from Original Works! It’s a great seasonal craft that looks adorable on our products.
Age Group
Toddler – Grade 2
Time
20-30 minutes total
Materials
- white 8 ½” x 11” art paper
- brown, orange, blue and black construction paper
- washable white paint
- small round sponges or sponge brushes
- glue
- black markers
- scissors