Lesson Plan: Ice Cream Cone
🍦 Objective:
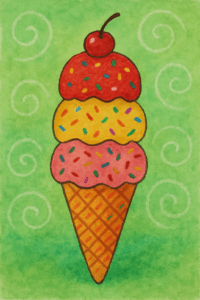
Create a colorful ice cream cone using line, shape, and pattern — topped with a sweet resist-method background!
🧠 Concepts Introduced:
- Warm vs. cool colors
- Shape and pattern repetition
- Crayon resist technique
- Composition and layering
Process
- Draw the Cone:
- Using a pencil, lightly sketch a large cone (triangle) starting at the bottom center.
- Add at least three scoops on top using curved lines.
- Add a cherry or fun topping if desired.
- Add Detail:
- Draw patterns or textures on each scoop (lines, dots, zig-zags, sprinkles).
- Decorate the cone with diagonal lines for a waffle look.
- Trace & Color:
- Trace all pencil lines with crayon.
- Fill in the entire cone and scoops using warm colors (reds, oranges, yellows, pinks).
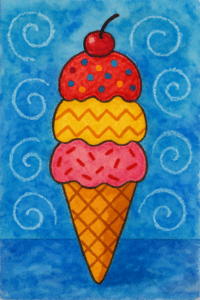
- Resist Background:
- Use a white crayon to draw cool-colored shapes or swirls behind the cone.
- Wash over the background with watercolors to reveal the crayon designs.
- Final Touch:
- Make sure all sections are fully colored in. No blank spaces!
💡 Tips & Tricks:
- Crayons should press firmly to ensure good resist.
- Keep the cone large and centered on the page.
- Let the background dry fully before handling.
Age Group
Grades: All ages
Difficulty
Easy
Rated 2 out of 5
Time
🖍️ Materials
- 8 ½” x 11″ white art paper
- pencil
- watercolor paints
- brushes
- water
- crayons
- markers
- example of the project