Crazy for Clowns! 🎪🤡
Process
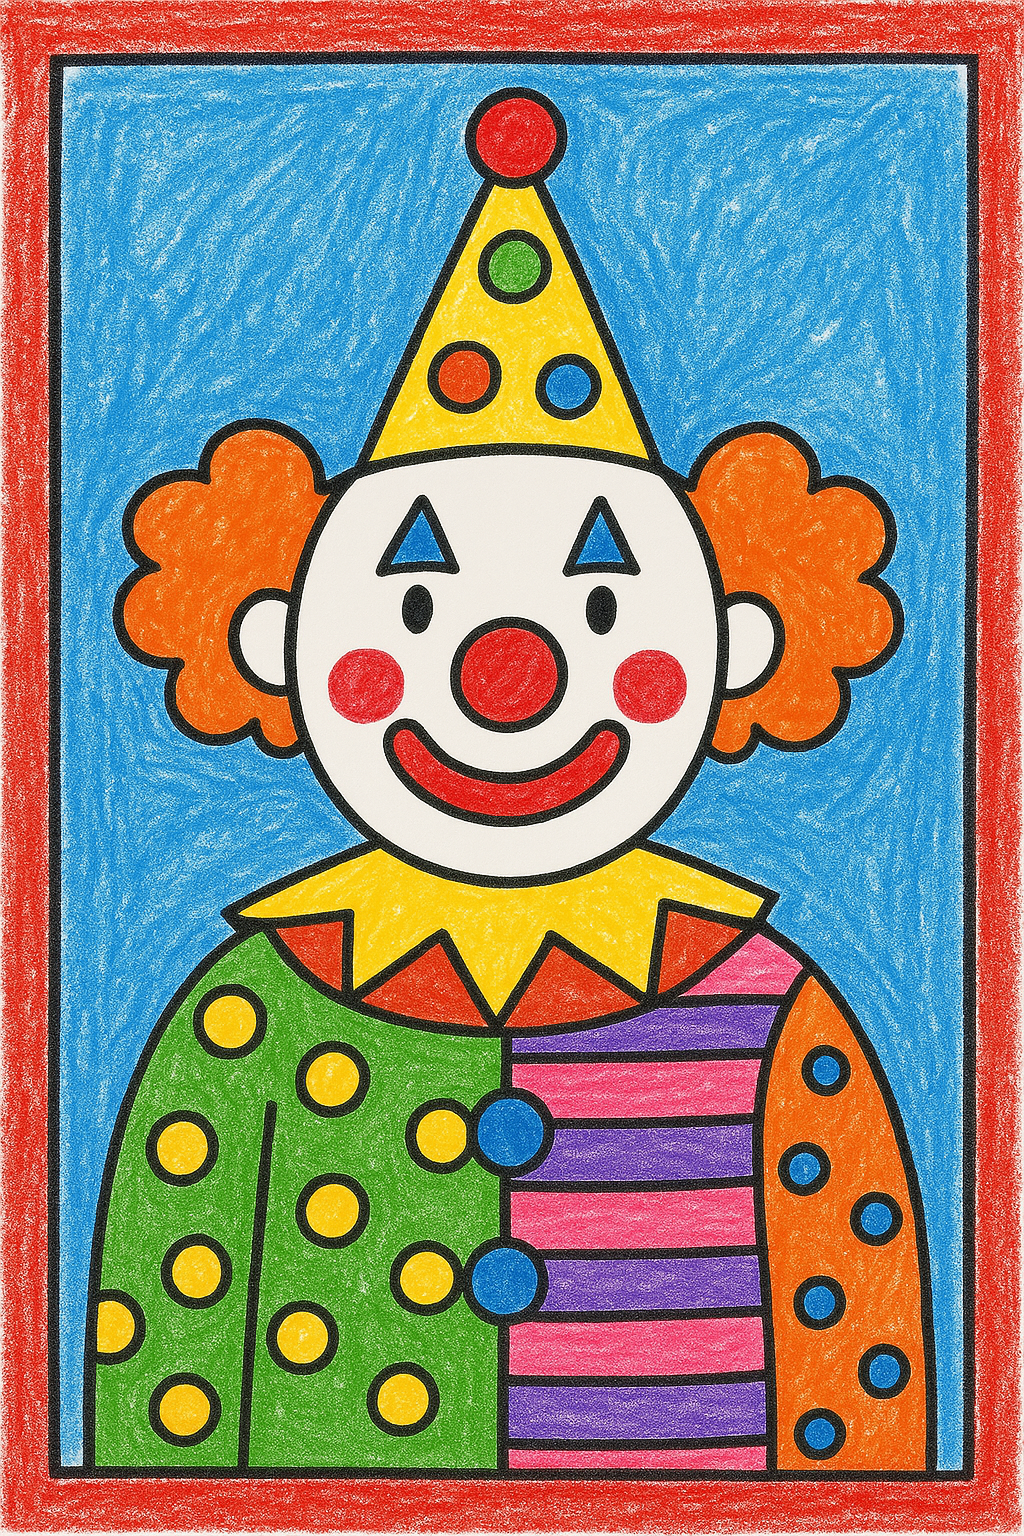
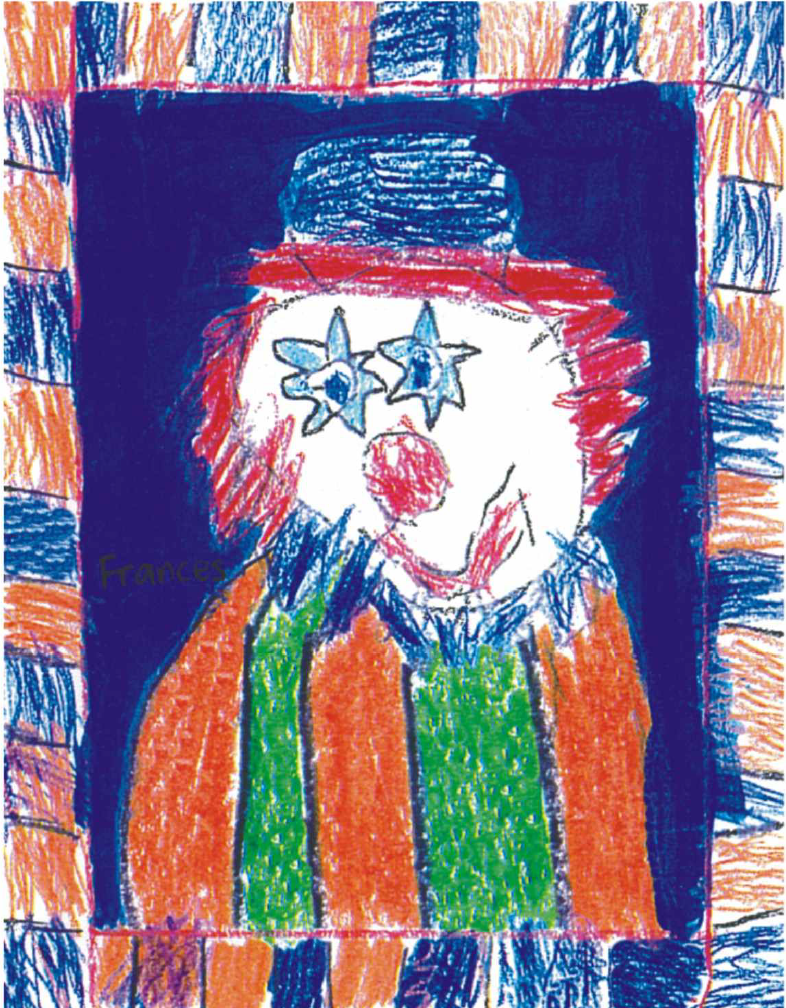
Day 1 – Drawing the Clown
- Discussion & Inspiration
- Talk about clowns—what they do, where they’re found, what they wear.
- Show examples of clowns and various hats.
- Review geometric shapes (draw examples).
- Drawing the Head & Collar
- Using a black crayon, draw an oval or circle for the head.
- Draw a collar using zig-zag lines or loops.
- Remind students to fill the whole sheet.
- Facial Features
- Use geometric shapes to make eyes, nose, mouth, and optional ears.
- For the mouth, draw a small smile, then a larger one around it, connecting the ends.
- Hat & Hair
- Draw a hat (show 2–3 styles).
- Add hair: colorful lines, curls, or cloud shapes at the sides of the head.
- Patterns
- Add patterns (stripes, polka dots, zig-zags) to the shirt, collar, and hat.
Day 2 – Coloring & Painting
- Color with Crayons
- Color all parts of the clown (except the face) with bright colors.
- Press hard for rich color.
- Leave the clown’s face white for now.
- Borders
- If desired, add a decorative border using crayons, paint, or construction paper.
- Painting the Background
- Choose a background color that hasn’t been used in the clown drawing.
- Discuss complimentary colors
- Use tempera cakes to paint the background.
- Finishing Touches
- Add rosy cheeks, lines around eyes, eyelashes, earrings, etc.
- Color with Crayons
Age Group
Grades K-1
Time Needed
2–3 sessions (45–50 min each)
🖍️ Materials
- White 8.5″ x 11″ art paper
- Black crayon (for outlining)
- Colored crayons
- Tempera cake paints
- Examples of clowns (photos, illustrations)
- Pictures of different types of hats
- Optional: construction paper (for a border)
Shared by:
Margaret Scully, Art Educator @ Pinehurst, NC