

Watercolor Resist Lesson Plan
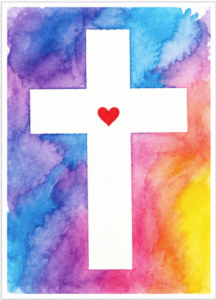

Step-by-Step Instructions
Step 1:
Create the Cross
- Tear or cut pieces of masking tape.
- Place one long strip vertically in the center of the paper.
- Add a shorter strip across the middle to form a cross.
- Press the tape down firmly, especially along the edges.
This plan can be modified from a Cross to another shape of your choice.
Step 2:
Paint the Background
- Wet your brush and paint around the taped cross.
- Blend colors together while the paint is still wet to create a soft watercolor effect.
- Cover the entire background, painting right over the masking tape.
Step 3:
Let Paint Dry
Allow the painting to dry completely before removing the tape.
Step 4:
Reveal the Design
- Carefully peel away the masking tape.
- A bright white cross will appear beneath the paint.
Step 5:
Add the Heart
Place a small red heart in the center of the cross using either paint, a sticker or a paper cutout.
Optional Extension 💖
Invite students to write one word on the cross or back of their artwork that describes what the heart represents to them, such as love, hope, peace, kindness, or faith. This encourages personal reflection while keeping the artwork open to individual interpretation.
Age Group
Grades K-5
Art Concepts 🎨
- Watercolor resist
- Positive and negative space
- Color blending
- Contrast
- Shape
- Symbolism
Time
30-45 minutes, + drying time
Materials
- 8 1/2″ x 11″ white art paper
- Masking tape (1–2 inch width works well)
- Liquid watercolors or watercolor paints
- Large paintbrushes
- Water cups
- Paper towels
- Example of the project
Finishing Touch
- Red paint or
- Small red heart stickers or
- Red construction paper (punched or cut into hearts)
- Glue sticks (if using paper hearts)