Things To Make You Go “Boo”!
As fun as it is to hit your neighborhood Halloween store in search of décor, it’s just as rewarding—if not more—to make your own DIY Halloween projects for your home! The options for crafting a ghoulish Halloween, whether it’s for personal use or art fundraising, are seemingly endless.
In that spirit, here are some ideas for DIY Halloween crafts, decorations and props that will make great additions to your home’s seasonal flair, as well as attractive offerings for your next Halloween art fundraiser. Happy haunting!
Ghostly Images
Sure, framed photos of family and friends make for great household decor during the year, but for Halloween, up your portrait game with something a little scarier. To make a series of haunting pictures for display:
- Start by making a black-and-white copy of any portrait you wish to use.
- Then, “age” the image by brushing it with a sponge dipped in a solution of water and a few drops of black craft paint. Let the paper dry.
- Next, cut a piece of card stock to the same size as the photo, and then glue it to the back.
- Take an X-Acto knife and cut out the eyes of the person(s) in the portrait, creating 1/4-inch holes.
- Grab your desired frame, remove the back, and then place the photo inside.
- Insert red mini LED Christmas lights through the back of the picture into the eye holes, then replace the frame backing, taping it if necessary.
- Plug in the lights, display the frames and drape them with cobwebs. For a vampirical twist, glue or tape small paper fangs to the subject’s mouth.
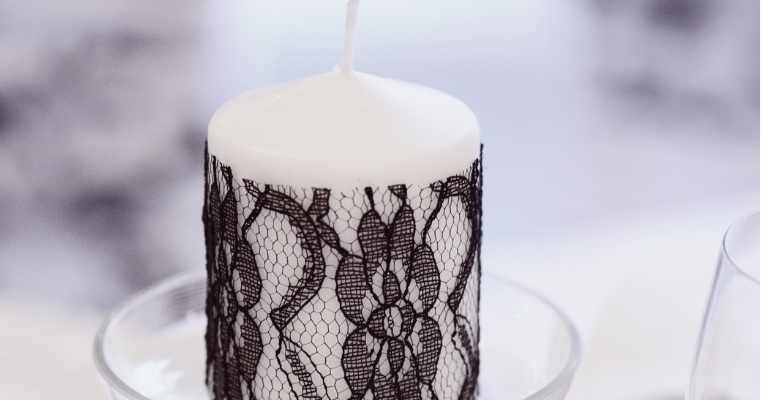
Lace-Wrapped Candles
For a super easy haunted Victorian touch, cut a length of lace, lay it on a paper plate, and brush it with non-toxic, non-flammable black tempera paint. Then, roll a pillar, votive or tapered candle across the lace, to pick up the pattern.
Let the paint dry for at least an hour before lighting the candle. For a similar approach to glass candle holders, stick a strip of lace-printed tape to the outer surface.
Evil Eyeball Wreath
If you can get your hands on about eight-dozen glow-in-the-dark rubber eyeballs, you can create a truly eye-popping Halloween wreath. Take a 12-inch foam wreath form, and wrap it in black crepe streamers secured with straight pins. Next, poke a hole in the back of an eyeball with the sharp end of a flathead pin, the insert the flathead end into the hole. Using a thimble, push the pin halfway into the eyeball. Then, push the sharp end into the wreath form, thus mounting the eyeball. Repeat until the wreath is covered with eyeballs.
Bug Soaps
Foster a terrifying Halloween bathroom experience by making your own bug-filled soap bars. Following the instructions on the package and using a candy thermometer, melt extra clear soap base in a large pot on the stove, until it reaches 140 degrees. Then place one plastic bug toy belly-up in each of a series of soap molds. Carefully pour the melted soap base into the molds, until it reaches the top. When bubbles start to rise, scrape them off with a knife. Place the molds on a flat surface and let them harden overnight, then remove the soap bars from the molds.
Eerie Terrariums
Find a few used jelly, pickle or other glass jars, and then wash and dry the jars thoroughly. Find a sturdy twig for each jar that’s slightly shorter than the jar, and hot glue the twig to the inside of the jar’s lid, so the twig stands up straight. Next, hot glue plastic bugs, faux ravens, etc. to the twigs, making sure they fit inside the jars. Then, spray paint everything but the jar (twig, lid, bugs) either black or white. (If you’re using a fake raven, don’t paint it.) Once dry, hot glue green floral moss around the twig’s base. Place the jar upside down over the lid and screw it on.
Spectral Mirror
For a haunting reflection, draw a ghostly figure from a sheet of frosted window film. Using an X-Acto knife, cut out the figure, as well as the eyes and mouth. Apply the film to a mirror, smoothing out the air bubbles as you proceed.
Mummy Vase
Sometimes you need an illuminated 4,000-year-old Egyptian to cap off a room. To make a glowing mummy vase, cut some cheesecloth into 3- to 4-inch strips. (If possible, look for cheesecloth in your local craft store that has a faux aged/stained look.) Take a basic round glass vase, and then use tacky glue or hot glue to wrap the vase with the cheesecloth. Finally, glue a pair of moveable eyes to the vase, so that they’re peering out from the cheesecloth “bandages.” Place a flameless flickering LED tea light inside the finished mummy vase for the perfect undead glow.
Frankenstein Pedestal
The core item for this project is an unpainted ceramic Frankenstein head. If you can’t find one in your local craft store, they are available online. Once you’ve found one, paint as desired with lime green, black and red paint, letting it dry completely. Add black pearl adhesive stickers to both of Frankenstein’s scars, and then use the same stickers to line the rim of a black plastic dessert plate. Next, wrap the rim of a black candle pedestal with black-and-white washi tape, then top the pedestal with the plate and head. Place on the mantel or use as a centerpiece.
Spider-Web Doormat
Draw visitors to your door by making a simple spider-web doormat from pretty basic materials. Start by purchasing a black indoor/outdoor needle-punch carpet. Make it into a circle: First mark the carpet’s center point with a Prismacolor white-colored pencil, then measure and mark the distance from that point to a place about a half-inch from the rug’s edge. Cut a piece of string to match that measured length, then attach one end to the white pencil, and using a tack, attach the other end to the center point you marked on the rug. Pulling the string taut, draw a large circle on the rug. Remove the string and cut out the circle, cutting inside the drawn circle mark. The next step is to make the web. With a yardstick, draw eight even intersecting lines, crossing the rug from edge to edge. Draw arches between those lines, all around the rug, to complete the web pattern. Finally, finish the rug with a clear finishing spray to protect your captivating creation.
For more lesson plans, visit our handy lesson plan archive.
Original Works can help make all of your fundraising events fun, easy, and profitable! Contact us for more information…it’s easy to get started!
You might also like: